1. Find any envelope you want to use for the size. Small, long, square, whatever. Even little package name tags size are fun to work with and have on the page
2. Turn it over to the back. Look to see "how" it is constructed. Usually there is one large flap "glued" over the top of 2 side flaps
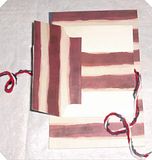
3. Starting at the top, gently start "tearing" or peeling the large front flap away from the smaller flaps on the sides. Tear slowly and gently but if it isn't perfectly torn or there are gaps, it won't matter - that is fixable. Just try as slowly and gently as possible to pull the flaps apart to make it easier on yourself!
4. Once apart open it up and now you have your pattern!
5. Open the envelope pattern you just created. flatten it out. Place it on the paper you want to make into an envelope. Sometimes a tiny bit of glue stick in the middle is a good thing to do so that it stays in place. Just make sure you put the glue where the glue residue WON'T show once the envelope is done. Trace around the pattern. Remove the pattern from the paper.
6. Now to make the fold lines: Using the "real" envelope for a guide, take your ruler and line up from side to side, where the folds should be. You will only have 4 fold lines, 2 vertically and 2 horizonaly. Draw a line for each fold. At this point you just make the fold on each line you have drawn.
7. Fold the 2 side flaps in and then fold the lower portion UP, then fold you top flap DOWN. Use your ruler or bone folder to flatten the creases. Now your envelope is created! Apply adhesive ( I use glue sticks) on the side flaps. Fold the bottom flap up and press for the glue to stick. The top flap just folds down.
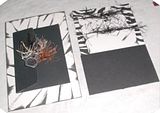
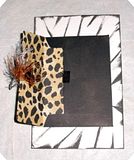
To add extra embellishment: I always cover the inside of the envelope that is visable, like this

Take the envy you just made and lay it on a contrasting piece of paper. Place it open side up so you can see where to end it. Make the contrasting paper go just below the bottom flap's edge, just to make sure there is no gap showing and when you open the envy all you see is the contrasting paper.
Trace the outline of the envy - basically just the top half of the envy is what you will be tracing. Cut this piece out, and do a bit of wigglying and a small trim of the edges that go inside the envy so that it matches the closing flap. Hard to explain, but as you do this, you will see what I am talking about. Then just glue it down!
Make sure you have glue where the fold line are, and make sure you flatten this very well - use your ruler or a bone folder to smooth it out. This makes sure that there is no "bubble" of the paper in that area.
And you are done!!


No comments:
Post a Comment