Thursday, March 29, 2007

Scrapbook Your House to House to House....

As a youngster, my family moved alot. I don't remember the specific years, but I remember the moves by the schools that I went to and what house I lived in. I wanted to preserve the memories I have of each house, but again, so much time has past. This scrapbook layout is in my album called "My Life". It is just about my life, so there are other references to the houses I lived in, but I wanted memories of each house to go along with the photos. Most of the memories listed are literally about the house itself - that cool stair case or the favorite places we played or that closet that we turned into our own "library" so we could play library!


SCRAPBOOK LAYOUT DESCRIPTION
I took the specific memories of each house and journaled about them, and then included a photo of each house. The first 3 are in California, the fourth one is in Ohio and the fifth one is back in California - a 20 year span of time on a 2 page 8x10 spread! I even remembered the address and most of the phone numbers!

SCRAPBOOK TECHNIQUES USED
This scrapbook layout is called a "double page spread" as it is 2 pages for the same layout. This one is 8x10 in size and in page protectors. It is quick and easy (quick, once the memories are journaled!) I just typed the journaling on cardstock, seperated into a paragraph per house, used a corner rounder punch for the photos and the mattes and matted each photo onto cardstock. I didn't want the layout to get to "buzy" so I just added some handmade punch art flowers in the corners. I put the address and phone numbers below each photo


Another way I have done this (in my siblings albums I made them) was to create a "post card" of each photo. I put the photo on the right side of the card (in the place where you would normally write a note) and then on the address side, I put the address of the house. Turned out really cute!


SCRAPBOOK TOOLS USED
Paper trimmer, cardstock, photo adhesive, computer typing for journaling, corner rounded punch, gel pen, handmade punch art, glue stick. Quick, easy and inexpensive!


Sunday, March 18, 2007

Preserve Your Memories OUTSIDE the Scrapbook Album

Preserve Your Memories OUTSIDE the Scrapbook Album Box!
I have been wanting to learn about digital scrapbooking so in surfing the web, I found this site. I thought it was about digital scrapbooking as far as scanning photos and savings designs and such, organizing it all in a photo editing program and then just printing out a completed scrapbook layout page.

Boy, did I find something outside of the scrapbooking box!

*
Online Crafting at DigiKeepsakes.com using photos and scrapbook pages is another way of preserving your memories "outside the box" of traditional scrapbooking! This is the most amazing thing I've seen in relation to scrapbooking in a long time!

From your scrapbook layout (or any photo) to home decor, fashion apparel, blankets, flags, tapestries, banners, pillows, table cloths, towels, even dorm room decor and more! What a way to display your memories! You can decorate a blanket with your babies face! Talk about sweet slumber! Or how about making a banner for your college student's dorm room of them with their friends from back home? Or even a beautiful scarf around your neck with your child or grand child smiling out at you!

And Online Crafting at DigiKeepsakes.com using photos and scrapbook pages does it for you! You send them your special photo and they will create your memory on your choice of display!

I myself, am searching for the perfect photo to use for a blanket. I am thinking of Christmas gifts here. I know my daughter would love to have a blanket with her and her little girl on it! And what a way to say "I Love You"! The blankets or pillows would a make great wedding gift! Give a Gift Certificate to Online Crafting at DigiKeepsakes.com as a baby shower gift! Wow, the options are amazing...as is the product.

So I just thought I'd share my new discovery and let you all in on what I think, is one of the most wonderful ways of preserving your memories to come along since the scrapbook memory album! Take a look and see what you think!

Saturday, March 10, 2007

Scrapbook 11 Photos- One Page - The Accordion Way!

I was one of those scrappers that took photos upon photos upon photos of my first grand daughter. No matter what she did or where she did it, Nanny was there with that camera! Probably the most photographed kid in the country! Okay, I know I share that with every other grand mother, but the next problem was how to display all those photos! Throw away a photo? Yeah, like that's going to happen! I wanted every second to be remembered.

But again, that age old question of how many photos per scrapbook page? I use 12x12 instead of 8x10 for the main purpose of being able to have more space for memories and photos, but even a 12x12 can only take so many! So I had to figure out a way to put more photos on the 12x12 pages!

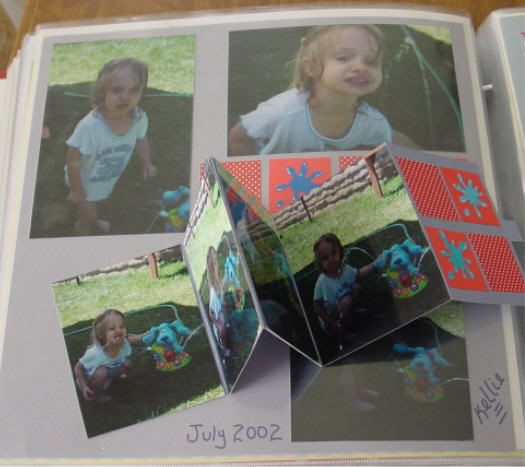
An accordion album can mean alot of things and can be created alot of ways. I was concerned about the thickness this embellishment would cause. But, where there's a will, there' s usually a way! So intead of making an "all by itself", "book in a book" kind of thing, I just did a simple technique with a couple folds and made the perfect accordion fold booklet for my scrapbook layout.

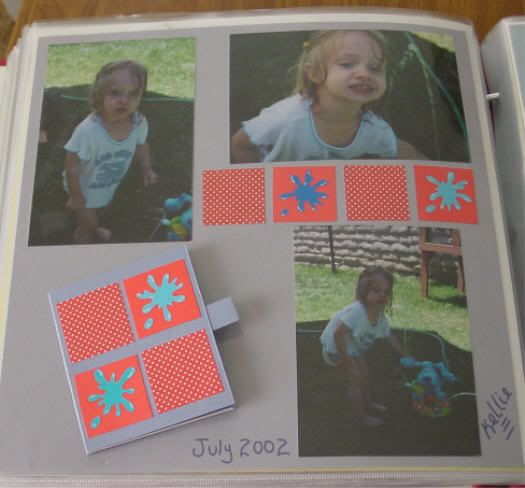
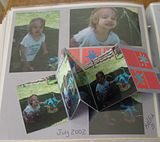
This layout was just of my grand daughter playing outside in the sprinkler. Since this layout was #2 in the sprinkler "photo layout", I didn't do any journaling on this layout as that was already on the first scrapbook layout. However, all you'd have to do if you did want journaling would be to use sections of the accordion book and journal on it instead of putting a photo on it.

In addition, this layout was not particularily to remember the event or what she was doing, but it was more to remember that FACE!! That precious little cherib, darling, princess, cute, adorable, face with its priceless and beautiful smile!!! Totally unrehearsed, just plain, pure sweetness! A picture that is saying about 5,000 words!

The only other embellishment is four, 1 inch square punchies with a water splat sticker .

To Make the Accordion Folder

To make the folder, just choose the size of photos you want to use. I cropped these to the size of just the main picture and very little background. I wanted to see the baby, not the background. This folder is about 4x4 in size. I used 12x12 size cardstock and cut 2, 4 inch by 12 inch lengths. I scored them every 4 inches, and then made the folds. Then I glued the 2 lengths together and folded the total length into 4" pages. One 4" section is glued to the background cardstock. To add the photos, there are 4 photos and one "cover" on the one side of the folder, and then 4 photos on the other side. A little tab pull made from a piece of folded cardstock and adhered as the "pull" of the book. I decorated the cover with matching squares as I used on the page embellishment.

So quick and easy and you have 11 photos on one scrapbook layout page!

To Put In a Page Protector...

To put this scrapbook layout in a page protector, just slide the layout into the page protector with the accordion folder closed. On the right side edge of the accordion folder, take your craft knife and make a slice down the length of the back edge. Start about 1/4" above the folder's spine and slice to about 1/4" below the spine. This allows for the accordion folder to open without pulling on the page protector. Now, gently, work it until you pull the length of the accordion folder out through the sliced opening in the page protector. Now you have the accordion folder on the outside of the page protector, and the layout is inside the page protector.