Saturday, August 08, 2009

45 Years of Memories - And I Organized Them Quick and Easy!

After 45 years of pictures, I finally got an album of my OWN LIFE done. I had tons of photos (and slides!) and made a "My Life" album for each of my 3 siblings and one for each of my parents and one for each of my own kids, but never got to my own life. When I got the urge to do my own Life Album, I just wanted to get it done and have it before something distracted me again and I'd never get back to it.. So I gathered all my photos, black and whites too, and got started!

I started by doing a Personalized Title Page. this one is for my brother - he was a fantastic musician all his life, so I hand cut the musical staff and found pictures of him (his face only) at different ages in his life, and with a circle punch, made the face circle the circle part of the musical note.
Photobucket

How Did I Organize 100's Of Photos From 45 Years?
Well, it was actually pretty easy. I chose to organize them according to the HOUSE we lived in. We moved around alot and I remember the house and the schools I went to for the time periods. For instance, I remember going to Sierra Vista Elementary School when I lived in Fullerton and I was in 4th and 5th grade. The year? I didn't remember. We did alot of camping and long camp trips - the year? Don't remember, but I certainly did remember the trip and things that happened. Holidays? Again, no year, but look at all of us in the photo...remember about that present or that tree or......


How Did I Manage The Memories?
That is one thing that is hard to do - you go through life and think "That was so wonderful, I'll never forget that!". Well, unfortunately, you do forget over time. I looked at the photos and some I could remember and some I couldn't. We are talking 45 years ago here! So instead of trying to make a memory for each photo, and since there were alot of memories I had and some had photos and some didn't, I decided to journal ALL that I could remember about the time period of each set of photos ! By that I mean, I just sat down and brain-stormed about the "house" or "school" time. Not only things that I remember about myself, but also about my siblings, the house, the school, friends, places we went, holidays at the time - anything I could remember for that period of time. Many of these layouts are 4 page spreads with the journaling as the middle page!


How I Organized It
After my brain storm of memories (few tears and smiles included there!) I went back and I grouped several memories about similar events or times. I put all the memories about my siblings together, then about my friends. I just organized it into a bit of EVENT sequence.

Below is a 2 page spread of "the years". With four of us, Dad always had us posing group style wherever we went... so 4 "Group" photos per each of the 2 pages... covered 18 years!

Photobucket


This is time spent with my grand parents and what I remember about those 2 wonderful people and that wonderful house grandpa built with his own hands! It is a 4 page spread with journaling and photos on all pages.
Photobucket


Then I Just Made It Look Nice!
I found a fun font and use a color ink and printed it out on cardstock. Depending on how many memories I had, some pages were 8x10 fully, others were only half a page long. I decorated with stickers and put it in a page protector. The ones that were half a page long, I just cut down the page protector to match the half page. Some pages just have matted photos and journaling - quick and easy!

It might not be this great and wonderful chronologically specific scrapbook, but it does have my memories and that is what really matters. Actually the AGE or YEAR isn't the topic of the memory, it is the EVENT and what happened that you are wanting to remember, not really how old you were or what year it was. I look at this album often. It is nice to just remember.

Thursday, July 02, 2009

When Journaling Captures the Memories

My brother took me to Cocoa Beach one summer. It was FANTASTIC! The view of the beach from his balcony was AMAZING!!! I can still hear the waves crashing to shore and I see the cruise ships heading out to sea!!! And to relax in the silence and just hear nothing but waves... boy, what a relaxing time! Something that I have never done before!

Journaling Captures the Memories

Photos are nice but they just don't always capture the experience. A photo of the ocean is a photo of the ocean. Nothing specific to point out. But my feelings and emotions ABOUT the ocean were so strong, in this case the memories couldn't be accomodated by photos. That is when journaling became the point of memory.

The Title Page and Photo Letters

Title Page: I had seen this letter technique and decided it was time to use it. I took a photo of the ocean, and using a 3" tall by 1 inch wide stencil (got it in the art section of the craft store - no where near the scrapping section!) I turned the photo AND the stencil backwards. Now I am tracing the letter backwards on the back side of the photo. Make sure you do the word in spelling order even though you are tracing them backwards. This way, when you turn them around, the letters spell out the word and the picture scene stays correct. Now I have FLORIDA spelled out in an ocean view!!! I purchase a pattern paper of clouds and glued them on adding only a die cut of a sea gull. Quick, cute, perfect and wonderful!!!


Because the journaling was so much, I chose to use the computer to type it all out. I chose a nice "relaxing" style of font, chose ocean blue for the print color and they just started typing my memories on white cardstock. If you look at this photo - you'll see a little sea-scene at the bottom. I wanted to break up the journaling a bit, so I created this little scene with punchies. I tore the paper to make it look like "sand" against the blue water.


The opposite page, is a pattern paper of the sea shore and on top of that I just matted (with differnet matching colors) 2 photos for where I stayed so as to "start the story".

Again on this double page spread, I have included lots of computer journaling. I chose the color to match the colors in the photos and also used those same colors to create the "shadow box" of sea shells. I picked up a few crumbs of broken shells and brought them back with me. Made this shadow box out of page protector plastic and a picture frame die cut. How easy is that! And the memories!!


The weather there was so amazing! It was nice and pretty and then in minutes went to windy and then the clouds rolled in and the rain started! I couldn't believe it! And I took these pictures mainly of the sea gulls, but later noticed that if i put them all together I got that weather sequence that I remembered! And I didn't even realize it at the time that I was taking them like that. I was just taking of the birds because there were so many! But look how great it turned out! I double matted the photos, in brown and blue to match the colors in the photos and then did computer journaling talking about all the feelings I had at the time. The scan doesn't show the beautiful colors but they really are beautiful!


So remember..... journaling is so important! Don't think that you can only journal ABOUT the event. Journal your FEELINGS about the event. Often those are more important or more powerful than the event itself!

Monday, May 25, 2009

How To Find Scrapbook Supplies at a Yard Sale

Scrapbooking is a huge and quickly growing cottage industry craft. I have been involved with scrapbooking for 10 years. It is amazing how it has changed. From simple to ornate, from flat to bulky. "Anything goes" in scrapbooking it seems. Acid free is a concern, but even with that issue, the embellishments and supplies currently on market are addressing that so you don't have to! New supplies come out every month, if not every week. I go to craft stores in my area and just browse the scrapbook isles and every time I go, there are new features, new items, new embellishments. Seems it is never ending. And that is great.

Scrapbooking is a fantastic craft, and in my opinion, the best way to preserve memories for generations. As usual though, expense is always an issue. Although I do admit scrapbook supplies have gotten a lot more reasonable in price today than they were 5-10 years ago, sometimes they are still to expensive and if you don't have the income to accomodate, well, the scrapper you are makes you look elsewhere so that you can still preserve your memories for generations to come and satisfy your craft bug!
So where can you find affordable scrapbooking supplies? Well, you can always shop store sales and use coupons. I have found that to be a great way to get the more expensive stuff. Coupons can also work for the less expensive items too, but sometimes they just don't have what you want. So since scrapbooking is a craft, use your crafty mind and think about how else you can conquer expense to save your memories.
Where can you find really good things at a really low price? Yard sales! Yes, that's right, yard sales...or garage sale, estate sales or rummage sales. These ales are a treasure trove for craft supplies! "One man's junk is another man's teasure" - really speaks loudly for the crafter.
What to Look for To Find Scrapbook Supplies
Clothing: One of the most popular items at any yard sale is out-grown clothing. Especially baby clothes. Those little tikes out grow the clothes faster than they wear them out which means the clothing is still in great condition. Look at the buttons. Cute little, whimsical, pastel buttons. Buttons are a great scrapbook
embellishment. Cut them off the clothing item and glue them on with glue or pop-dots - great for the "bulky" look. Also look at the pattern in the fabric and cut that pattern out - if there are little trains or ducks in the fabric pattern, cut them out and run them through a Xyron machine to put adhesive on the back and they secure neatly to the background paper! Makes the perfect fabric die cut! You can do this with any fabric pattern.
Older childrens clothing also has some finds. Jeans have those copper, western looking buttons - great for a masculine, outdoor-zy or western theme layout. Or even cut the pocket off a pair of denim jeans and use the pocket as a pocket on your layout! Look at clothes that have name brands displayed on the front - great if you have a favorite brand you want to remember. Just cut the brand name off the article of clothing and use it as a die cut. Sometimes it is a saying like "I Love Roxy". Although a clothes brand, my grand daughters dog is named Roxy so I can cut that out of the shirt, run it through my Xyron and have a fantastic title for a layout about her and her dog! Look at collars - cute fringes or lacey collars- would make a great "border" to a photo. Appliques are also a fantastic addition to a scrapbook layout.

Other craft supplies: When I started scrapbooking 10 years ago, I had no help from anyone. My spending money was literally next to nothing. I started with photo square adhesives, a circle template and a scrapbook spiral album. But since I have been a crafter all my life, I had others supplies. Ribbons, threads, embroidery floss, fibers, buttons, appliques, yarns, beads, gems stones, rhinestones, jewelery pieces and charms were just some of the items I had. Granted, as I was just starting, I didn't realize I could use all these kinds of things, but now - boy, did I have a treasure trove in my craft closet! Look at any craft supply at a yard sale through the eyes of a scrapbooker - you'll be amazed at what you will find!

Books and magazines: Books are also a standard at most yard sales. I don't approve of destroying books, but at the same time, if the book holds a wonderful memory, I see no problem in preserving it for generations to come. Plus, you don't know that it won't get thrown away if it doesn't sell. Look at the books and see the pictures. Anything remind you of a favorite memory from your life? How about your child's life right now? For 10¢ you buy the book and cut out the item related to the memory. Instant die cut! Cut several images and organize them on the layout page to create a "scene" relating to the memory. Magazines are also great for this but you have to watch for acid in the pages. You can buy an acid-free spray and spray the magazine page. What I did was just insert the magazine page into a page protector and the page protector onto the scrapbook layout page.

Post cards and stationery: Not often as common, but out there just the same. Whether you use the post card as is or cut images from it, you have instant stickers! Cut theimage out, run it through a Xyron machine use acid free glue sticks or photo adhesive squares and you have a sticker!Add pop-dots for a 3-D effect! You can do the journaling on the stationery as it is or cut the designs from the stationery to use as you need.
Board Games: Scrabble has those wonderful small wooden tiles of letters. Each letter can spell out the title or a person's name! Monopoly money is a great embellishment for layouts themed for shopping, travel and other money related scrapbook themes. Even the board could be a great addition - if it is to thick to cut, just scan parts of it to make your back ground paper or to cut parts out for die cuts!
Holiday decorations: Tinsel, christmas cards, wrapping paper, gift tags, paper wall decorations, candy wrappers, window clings, glitter, silk flowers - just take look with a scrapbookers frame of mind and the possibilities will jump out at you!
Other things you might look for: Labels from jars - just soak them off. I'd love to have a label from Knott's Berry Farm jelly jar as Knott's was my families favorite place to spend Sunday afternoons as a kid - way back before it was an amuzement park and cost admission! Nick-naks that can be disassembled to get to the brand name or the image you want. Hand made things like embroidered towels, doillies or lace pieces. Use as is or cut off the part you need. And those School work books- a great "back to school" background paper is a page of math problems from a work book; you just add the photos and journaling!
So next time you see a sign that says "Yard Sale", put your scrapbookers thinking cap on and stop and go shopping!

Thursday, May 21, 2009

How to Use Vellum In Your Scrapbook Layouts

One of my favorite materials to use is vellum. It is a thin, semi-see-through paper. And there are so many uses for this! I always liked using it for the elegance and dimension it offers a scrapbook page. You can cut it, journal on it, tear it, fold it, punch it, gel pen it... and the list goes on. It is a fun material to use on your scrapbook pages and the ideas are endless! It isn't very expensive if you shop around. I'd shop for this on sale too. You can get vellum in clear white and many colors. I prefered to use the clear mostly, so I found a place that sold in bulk about got it for about 10¢ a sheet. Here are 3 different ways I have used it.

Scrapbook Layout Description

"Best Friends"

In this layout of my daughter and her best friend, I used wallet photos and camera photos. The background paper is a pale lavender floral print. I used purple cardstock for matting the photos. The title letters are also purple cardstock. I made the purple and vellum daisys using a extra large daisy punch with a button for the flower center. Some of the photos are matted, some are not.

Use Vellum to focus in on specific images.


In this layout, I didn't want all that background in the photos, but didn't want to cut the photos so that they were really small. They would have looked kind of lost amongst the large photos. So I used a circle Coluzzle template and cut the photo out with the face in the center. I then cut a circle matte 1/4" larger that the photo from purple cardstock. I cut a circle of vellum the SAME SIZE as the photo and using a circle punch, and precise measuring, I punched a large circle out of the vellum exactly where her face was on the photo and laid it on top of the photo.

NOTE: With vellum, you can't use glue on it or the glue shows through (I believe they now have a speciality glue to use just for vellum, but its just another expense that you can do without if you choose) So to secure the vellum circle to the layout so it doesn't slip off, I took 2 small rhinestones, and glued them on the top of the vellum. I then put glue BEHIND the rhinestones on the back side of the vellum and glued it to the photo. Now, I know that you aren't suppose to use glue on photos, but this small, tiny amount, it is my decision that it won't harm anything. It is only just a tiny bit to gently hold the vellum in place. I did this on both the vellum circles.

"Flower Girl
"
This was my son's wedding. I did the journaling on the computer and it is in the words of his little neice as she was his flower girl, but was quite thrown by the whole thing! So I typed the journaling in her words on vellum. I attached it to the background paper simple by adding a piece of mulberry paper, crumbled it for effect and a button to bring it all together. I glued the mulberry paper to the vellum and then used photo adhesive squares on the back of the vellum UNDER the mulberry paper embellishment. You can read the journaling very nicely and the print background shows through just enough to bring it all together. A scrapbook layout to remember!
Use vellum for journaling
You can use vellum to computer journal on. I love this feature. It just gives that bit of elegance, yet not over doing it. The journaling is on the vellum and then placed on pattern background paper so that the pattern shows through the vellum for a "muted" background design, but not over-taking the journaling. The journaling blends in more with the layout instead of being the most prominent on the page.


"The Kiss"

For my son's wedding, I wanted simple elegance. I used a love song by Garth Brooks (I think it was!) that they played at the wedding and just typed it on white cardstock. I secured it to the layout with silver stickers.

Use Vellum for elegance and to highlight the theme of the layout.

I cut vellum the exact same size as the photos and then with precise measuring, I used a Coluzzle oval template to cut out the part to just focus on the kiss. One oval is horizontal the other is vertical. I secured the vellum with metallic silver heart stickers. The vellum creates 2 views of the same photo - one is focus on the kiss, what the layout is about, and then allows you to still see their attire through the sheer vellum. Now when you look at this layout, you focus on the kiss and feel its meaning. Simple elegance.

And you can use this technique on adult or children theme photos/layouts. Another good idea is to use this technique for school pictures - cut the circle out of the vellum for your child's face, but yet you can still see the rest of the class through the vellum. Or a family gathering or birthday- circle out the birthday person's face for focus, yet you can still see the rest of the family!
All these layouts are quick, easy and inexpensive.

Sunday, February 08, 2009

Remember the decade you "grew up" in. And No Photos Required!

As the years go by and times change, so do our memories. That's what scrapbooking is all about. We change, life changes, the world changes. Do you remember what happened in the world that made you who you are today? Do you remember things that changed the world as you were growing up? A scrapbook layout doesn't have to be about the memory a person. A layout can be about a time, a feeling or an event. Those kinds of nostaligia memories contributed to making each of us who we are today.

What went on in this glorious country that played a part in your past and contributed to who you are today? Do you remember? Got to admit, I don't either. I grew up in the 60's in elementary school and the 70's in high school. Wow, what a couple of nostaligia decades of change! So many new creations and inventions. Man walked on the moon and Archie Bunker changed the course of television. Talk about 2 extremes!

But what about you? Do you remember what happened in the country while you were growing up? Or maybe things happened that you don't remember or didn't experience personally but they made a huge impact on the country or world. I don't remember hearing about Neil Armstrong walking on the moon in July 1969. We didn't have a television or a radio. I assume the kids in school talked about it and the teachers probably talked about it but I have no recollection of its happening. But what an impact it had on this country!

So to help you do a scrapbook layout of contributions that impacted you and your kids, pick a decade and find out what happened during those 10 years. See how many you remember, how many you don't but wish you did or are glad they at least happened! Wow, the nostaligic memories will flood back and the tears will start to well up when you remember what you thought you forgot! And an extra added bonus to this method of memory collecting is NO PICTURES REQUIRED!

I did a layout like this for my daughter (now 28). I used her favorite colors of that time and just picked from the lists. Granted they might remember more than I do, but it was a general accumulation of nostaligia things in her decade.

I titled the list "You Know You Grew Up in the 80's If You Remember..." and a list of things that went on in the 80's from fashion to TV to fads and word phrases to toys and movies. Things like
...if you wore a ponytail on the side of your head
...watched Fraggle Rock.
...wore yellow construction boots.
...wore biker shorts and baby doll tops and felt very stylish.
...remember "I've fallen and I can't get up!"
...thought He-man and She-ra should hook up
And the list goes on. And how much fun I had doing this as I remember my daughter doing almost ALL these things!


In this 12 x 12 layout, I only wanted a single page spread, so I made a removable page where the list continued. Only supplies I used was brads and embroidery floss to attach the additional page. I typed the title "You Know You Grew Up in the 80's If You Remember...". I type the journaling in pink onto white card stock and then mounted it on black cardstock - this made the first "page", then mounted the first page onto the matching pattern background.

To make the additional movable page, I just made it smaller than the main page and did the same color scheme - pink ink on white cardstock on black cardstock. I used pink and black embroidery floss and attached it with brads. I adhesive mounted the first page on 3 of its four sides, leaving the one side open. I slide this page into the page protector and where I wanted the additional page to slide BEHIND the first page, I used a sharp craft knife and slit the page protector the length of the additional page. The additional page is now behind the main page, also protected by the page protector. It only comes out when you want it to!

An absolute ton of memories on one scrapbook layout!

Here are some links to places that can help you with this kind of memory search.

In The 70's, 80's, 90's Click the year at the top of the screen, then choose whatever category you like!

SCOPES SYSTEM - What Happened in History

AMERICAN FILM INSTITUTE - Hollywood History

TV GUIDE - TV History


Thursday, February 05, 2009

Acid Free - Yes or No? You decide...

We all know that acid free is the absolute best for scrapbooking. It keeps the items from fading, preserves them and gives them life for generations. Yes, that is good! However....

Sometimes scrapbook products and items can get rather pricey. I have been a scrapbooker for 10 years. I have seen the prices really high.

And while the price of these neat and "I want that" things are so high, the budgets we have for scrapbooking supplies usually doesn't increase. And those that scrapbook ALOT or have several albums going ( I always had at least 4) or (like I did) scrap every single photo ever taken of you children, these extra things tend to be to expensive for our budgets. I know there is a spray can of a acid protector solution - you spray on your papers. But it is out of my budget because I do so much that I just couldn't afford to buy that stuff for every page. Granted, it you can buy a can and use it sparingly or only on certain things like newspaper clippings, but what about the rest of the scrapbook embellishments? We still want to preserve and keep our albums from damage. But you can think about what you are doing and economize and still have well preserved albums.

Always use acid free cardstock or background papers. That is a must, as we all know. You can't scrimp on this. The cardstock, back ground, pattern papers are the backbone of the layout. Somethings you just can't economize on. HOWEVER... watch for sales! I know that Walmart has several options of reams of cardstock for a reasonable price. I get the ream of 500 white cardstock for $4.97. A penny a piece - doesn't get any cheaper than that! So what if the background of every page is white - utilize the other pattern papers for the color and embellishments. Also you can color up the white cardstock with inks and chalks! But this is your foundation - you can't economize on the foundation - just find ways to make it work for you!! Joanns' Crafts OFTEN has the pattern papers on sale. STOCK UP!!! Beautiful patterns, designs, characters, pretty much, you name it, they got it! I found a 12x12 sheet for each of the Disney Pricnesses - 6 for 96¢ so I got one of each of the Princess for my grand daughters Disney scrapbook. I browsed a scrapbook store one day and saw the same papers were 75¢ EACH!!!!

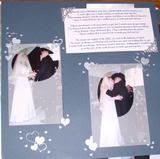
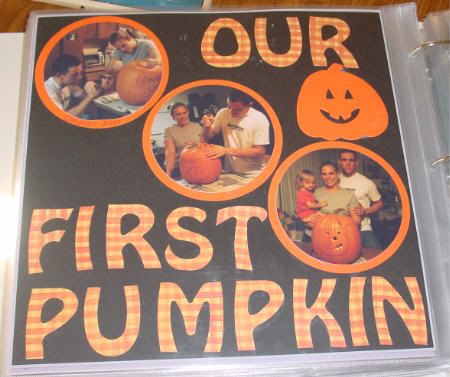
Matte your photos - at least once, but 2 or 3 times also creates a wonderful layout. Lots of color, and lots of acid free!

Even if you do 8x10, buy 12x12. This gives you 2 layouts for the price of one sheet of 12x12. First, cut out the 8x10 piece. That is your background paper of the first layout that you enhance with solid paper. The piece leftover - that is now the embellishment for the second layout - which has a solid back ground! Great for double page spreads!

SAVE YOUR SCRAPS! I mean it. Save them! You will be surprised at how often you just need a small piece of something and hate to cut that 8x10 or 12x12 just to get that small piece. I have one of those 3 drawer plastic storages. The first drawer is labled SOLID, middle drawer is PATTERN and the last drawer is OTHER. Anytime I have scraps I throw them in the proper drawer. Next time I need a small piece - for like die cuts or letters, I just flip through the drawer! The OTHER drawer is for like velum, or speciality papers. This has saved me so much money!!

And since not all scraps are 2'"2" - some are larger! Take several of the larger pieces and construct them for the background and you've made your background from scraps.

The only other thing that I would suggest you absolutely HAVE TO HAVE ACID FREE is the photo adhesive. Photo squares (which are my favorite) or that cool little runner tool thing - MUST HAVES. You shouldn't glue a photo. Even if the glue stick says acid free, you shouldn't use it on photos. Use the acid free glue sticks on other paper embellishments, but NOT ON YOUR PHOTOS. Loosing the embellishment you made is one thing, but loosing that photo - there goes the memory. You can replace the embellishment, you can't replace the photo.

But you want to put other things on your layouts. Brads, buttons, washers, envelopes, anything that you think of. Are these things acid free? There is a pen that you can buy that will tell on paper, but other things, wood, metal, etc, how do you tell? I don't know. So I use this theory. WHERE on the layout am I going to be putting the item? Think about it. I have this small bottle cap with a photo in it. Is the cap acid free? I dont' know. Am I worried that it will mess things up if it is not - well, no not really. Why? Well, first because it is metal. Metal doesnt' fade. Maybe the writting on it fades. but since I am putting a photo in it, what difference does it make. It won't get wet or rust. So why worry? Remember, you can only do so much. Nothing is guarenteed even though they say "lasts for 100 years". Just use your common sense.

Where are you putting the item? I have these little envelopes I got at an office supply store, I have no idea if they are acid free. But I use them. They are laying on acid free cardstock, they are decorated with acid free papers, and the card inside is acid free, and the entire layout page is in an acid free page protector. Other than 100% guarentee, this is a close as it gets. And if the envelope does fade, what damage will it do? It will probably take several decades to fade in the first place and what have you lost? Just the envelope. Again, no 100% guarentee, but pretty darn close.

So just look at what you are doing. Think about it with your common sense, and make your decision from there.

I welcome any comments you might like to leave or if you have any suggestions about acid- free....

Saturday, November 15, 2008

How To Scrapbook Your FAVORITE FOODS!

Scrapbooking is all about memories. Well, favorite foods can have some great memories! Whether the foods are yours or your kids, make a scrapbook layout about them so you'll remember in years to come! You might not think right now that there is much to remember, but in years down the road, they are guaranteed to bring a couple good laughs!
My grand daughter was 2-3 years old and she had her favorite foods and of course I had to document them! Her scrapbook would not be complete without these! This is a case when a scrapbook layout doesn't need any journaling - the memory is there, just not much to say about it but a picture holds a 1,000 memories! This way, you only have to do one scrapbook layout, instead of 1,000 words!!!

I Love My Chips!
At 2 years old, she loved sour cream and onion potatoe chips! The bag was nearly as tall as she was! I used a couple shots of her with the bag of chips. Then I cut the front portion of a bag of her favorite chips and glued it onto cardstock, then glued that onto the back ground page. I did this for the sake of protection from the acid - I have no idea if the bag is acid free or not, so I just did it this way to help the unknown. Each photo is matted on cardstock so the actual photo never touches the bag. I used 1/4:" letterpunch for the letters.


Peanut Butter Princess
She loved PB! So it was hilarous when she got ahold of the near empty jar and took her spoon and chowed-down! I used the same colors, blue and red, as in the jar label. Took the label off the jar and mounted it on cardstock and then on the background page. The letters are 1,1/4" die cut letter punches. Photos are doubled matted. The border is made with strips cut with a Coluzzle Template.

You Make 'Um, I Eat 'Um!

She didn't like the cereal by itself, but she did like the cookie bars you make from the Rice Cripsies. So one day when I was making them with her, I just let her eat off the mixing spoon! Then I cut the front out of the box, and the recipe for the cookie bars from the side. I mounted the front of the box on the layout and added the recipe (matted) by thread. I used eyelets on the recipe card and kind of "hung" it from the box front. That way she will always have that recipe! Photos are matted on cardstock.

All thses scrapbook layouts are quick, easy and inexpensive. Use your own judgement about the acid free issues of the packages you use.

Thursday, October 16, 2008

Our First Pumpkin - Quick, easy and lots of color!

When my son got married, they lived with us for a few months and Halloween was in there. We are not big Halloween fans, but we do like the fall and harvest-y themes of the season. I do like the carving of pumpkins and baking the pumpkin seeds!

So when I do a scrapbook layout on a theme that I am not a fan of, there's always an event or feature that is a memory other than the holiday, so I twist the layout theme to show the memory I do like about the event/holiday.

This scrapbook layout is a 12x12. It is titled " Our First Pumpkin". The kids carved it together with the help of their little 2 year old neice (my grand daughter that is "hosting" the swap of Box Tops 4 Education for Free Scrapbook supplies at Scrapbook For Box Tops

This scrapbook layout is quick, easy and few "supplies", but it still generates the theme of their first pumpking harvest/carving that they did as well as just a family function!


3 photos tell the story of the event. This is a 12x12 layout.

I cut the photos in a circle and matted them on a 1/4" larger circle die cut. The letters were purchased from Missy Made It . I added a pumpkin die cut and there you have it! Quick, easy but shows the "process" they went through from start to finish and a "family shot" at the end. Has basically nothing to do with
Halloween.
That's a fantastic feature of scrapbooking - out of the box, no right/wrong way to do it! It's your memory - you create its designation!