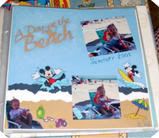
This is a wonderful scrapbook technique to use and it is so simple and easy, yet it yields dimension and shadow to your scrapbook layout.
Layout Description

Scrapboking Technique Used:
One tear of cardstock and it give you 2 edge-styles to work with. Take a piece of solid cardstock. Holding it in your left hand, take a portion (however much you need) and tear downwards. You'll see that the piece in your left hand has an edge that is solid color of (the paper) but then evolves to a lighter shade. The piece in your right hand, has just that solid color edge. You can choose which edge you want to use.
I have seen alot of this technique and it looks nice as a heritage embellishment, but the only way I have used it is as WATER WAVES. I then layered several colors of the torn paper to show the different colors of waves and the sandy beach!
Layout Assembly
I started with the light blue for the sky cardstock - my back ground paper. Typically, you would think to start "building" the bottom, but since you want those "torn paper" edges to be visable for all shades, you have to start building the beach from the top instead of the bottom. I layed out where I wanted the photos to get an idea of how "high" to make the darkest waves. Then I tore a piece of dark blue cardstock and layed it in the middle of the page. Then I tore a white cardstock, and placed the torn edge overlapping the dark blue. At this point, you could add another shade of blue if you like. The rest would be the "sand" of the beach, so I tore the sandy brown cardstock, but made it longer to add the beach to the layout. Now the colors are all there, in "order" and the beach is on top with the waves in the background! When you are tearing the paper, tear it with some motion to get "valleys and mountiains" so that the torn edge is not straight across. This adds to the dimension of the waves.
I then just layed the photos around, added the stickers showing the characters playing in the water, but put the photos of my grand daughter on the beach for the memory, that she didn't like the beach! Then in the sky, I placed the title die cut. Name and date and the layout is done and ready for your scrapbook!
Quick, easy and inexpensive - except for the lazer diecut, your only expense is cardstock and a few stickers! If you dont have the lazer die cut, use any die cut letters, or stamp the title or chalk it!
This layout just took a little more time, but no more expense and was still pretty easy. You can do this with any landscape ... browns or greens work great!


1 comment:
good picture
Post a Comment