Wednesday, November 29, 2006

Scrapbook The History In Your Life - No Photos Required!

While we are all taking photos of everything in our lives to preserve the memories in our scrapbooks, there is alot of lifes memories that we don't bother to document, but boy the memories that are there! So while making your own memories, don't forget to document the HISTORY in you life! You really don't want to forget "what it was like back then" or "what was going on back then". That's all part of memories for your scrapbooks.

So how do you scrapbook history that doesn't have any photos? JOURNAL! Journal what life was about "back then". Journal what happened in your life time. It didn't happen directly to you, but it was going on in the world, made a difference in the world, was was hot, a fad or quirky for the times and especially the things that changed your life or made history that year.

Find things that happened in the year you were born, or the year you graduated from high school or the year your first child was born. Just type it up on cardstock, matte it and mount it! No photos required!

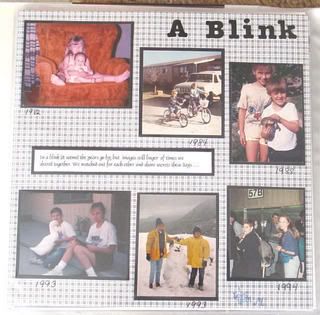
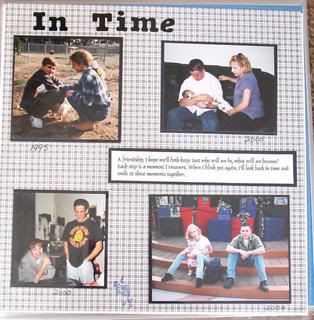
This layout is of June 1982. It is a 12x12, double page spread. I used white cardstock and double matte on a shade to match the date. I used 3 inch stencils for the letters and date.

Things I included:

Who was President/Vice President that year
Top 10 Songs of that year
What happened that month in past years
(June 1752 Ben Franklin's kite is struck by lightening!)
What happened during that month and year. (June 4, 1982 - The Wrath of Khan premiers)
The price of different things: loaf of bread, gallon of gas, milk, house price, price of a car
Hot/popular toys of that year
Top movies and TV shows of that year.

To get things that happened in a specific year, try Scopes Systems. Here you can input your month and year, and it will give you all kinds of great things that happened that month and year. Pick and choose which ones meant/mean something to you or changed your life (or the world) or had special meaning to you.

Another way to "remember the years" with no photos, is to document things that happened in Hollywood! Remember your favorite movie that year? Favorite actor? You can get some things from American Film Institute about TV, celebrities and movies in past years. They partiularly have a category called "Top 100 Years..." for movies and TV shows that were rated 1-100 in the last Century in different categories, like:

AFI's Top 100 MOVIE QUOTES (a no brainer on #1)
AFI's Top 100 PASSIONS (romance movies)
AFI's Top 100 SONGS
AFI's 100 THRILLS

You're going to have a blast from the past as you go here to find your scrapping information. Better bookmark it - you're going to want to go back!

This is a layout using the Top 100 Thriller Movies of the Century. I just typed them out on 2, 8x10 pieces of cardstock and printed the list out on the computer. (I am only showing one side, but this is a 12x12, double page spread) Then used a film strip die cut and a die cut of a movie camera. Quick, easy and oh, the memories!! And not a picture was needed.


Another layout I did was one I called Top (50) TV Shows of All Time. How Seinfeld made #1 over I Love Lucy, is a total fluke in my book, but what happens, happens! On this layout I copied from
TV Guide the covers of the ones that had my favorite shows and inserted this small "photo" into the film strip die cut. See- there's I Love Lucy right at the top like she should be!

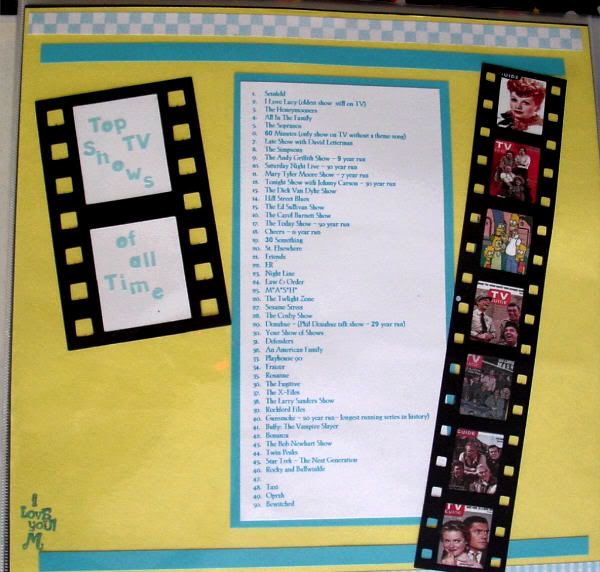
I just added a few paper strips (from scrap paper) and the layout is done in minutes...quick, easy, and inexpensively!

So scrapbook the history in your life time. There are lots of memories there that you will want to remember in years to come.

Tuesday, November 28, 2006

Scrapbook Titles That Include a Forgotten Memory!

Life is so full of things that make memories. You have memories from places you never thought of or possibly even forgot about. That's where scrapbooking comes in! It helps you remember even the little things some times.

Everyone watches TV. We all have our favorite shows from the past and present. But what about the phrases that came from a show and made it big in the real world? Think about how many of those you say - just because it is the current buzz phrase!! And often even if you didn't watch the show, you heard and even said the phrase. I never watched Hawaii 5-0 but knew the phrase "Book 'em, Danno" (Steve McGarrett, "Hawaii Five-O"). I seldom watched Friends, but heard alot of "How you doin'?" (Joey Tribbiani, "Friends") But of course since I was a Star Trek/Captain Kirk fan, I loved the phrase "Space...the final frontier."

Where are you memories of these times? Use these TV catch phrases as TITLEs for you scrapbook layouts! You might not have a photo to remember the actual phrase, but things happen to day that you want to scrapbook and to use these phrases as the titles, would not only give you the memory of the current layout, but an additional memory from the title!

Is your little guy into space? Were you a Star Trek fan? Use Captain Kirks phase as the title and photos of your little guy in his "space suit" or playing with his space toys. Double the memories!

Got a little one that loves to bake/cook? How about "Bam!" (Emeril Lagasse, "Emeril Live").
How about "I can't believe I ate the whole thing" (Alka Seltzer ad) next time your photos are of a huge family dinner!

Here's TV Land's Top 100 Catch Phrases - in alphabeticaly order. They will be doing a count down for Number 1, but look and find your favorite memory phrase and create your title and layout!

Top 100 TV Catch Phrases from TV Land

And even if you dont' use these as titles, how many do you remember? How many did you USE!!! Have a good laugh, a fun memory and watch to find out which is #1!

Monday, November 27, 2006

FREE Envelope Pattern and Directions

To make an envelope pattern, just take any envelope and gently, tear it apart where it was constructed, and you have an envelope pattern! Here is a pattern that I made using this procedure - you can just print it out!

Just print it out and start folding! Dash lines are fold lines.

Step #1. Fold side flaps in
Step #2. Fold bottom flap up
Step #3. Glue bottom flap to side flaps
Step #4. Fold top flap down

And there you have it! Decorate as you like! You can use pattern paper or solid cardstock. Just watch how your printer prints out to know if you put your pattern paper pattern side up or down in your printer. The lines will print our, so you don't want them visable on your "good" side of the paper you are using. Solid paper it won't matter - just turn the paper over. This size works well for an 8x10 layout. Fits nicely right in the middle to lower bottom of the page, and still has plenty of space all around for embellishment.

A good tool to have for this is a bone folder or plastic ruler to make creases instead of your fingers! It makes a much neater and specific fold. Also, a ruler and an embossing stylist are great for making sure your fold lines are straight and the top and bottom line up properly.

And watch the Christmas cards you get this year. Often they are odd or different sizes and shapes and you can use those for a pattern - just pull them apart where they are constructed!

Envelope Pattern

This particular pattern is slightly smaller to hold 4x6 inch photos. I had a horrible time trying to get it that size, and this the best I could get. However, to make it larger, after you cut the envelope out, cut it right down the middle and then right across the center. Place it on another sheet of paper and lay the pieces out with 1 inch in between the pieces (use your ruler) and glue/tape the pieces down. Now draw around that "pattern" and cut it out. This will add an inch all the way around, and allow it to accomodate 4x6 photos without having to crop them.

Sunday, November 26, 2006

Free Scrapbook Supplies for Box Tops!

I believe in a good education and I want that for my grand daughter. So I am doing this on a volunteer basis to help my grand daughter collect the boxtops for her school.

I am collecting the pink "box tops for education" squares on participating brands. Participating Brands are Pillsbury, Betty Crocker, Old El Paso, Bisquick, Hefty, Ziplock,Cottonelle, Kleenex, Scott, Yoplait, Saran Wrap, Hamburger Helper and Cheerios. And there is a variety of styles of each brand so you have a selection to choose from and still get the box tops. Here is what a "box top" looks like:

Just snip off the pink BOX TOPS FOR EDUCATION square from the top, side, back or bottom of the product and save them until you collect enough for your choice of free scrapbooking supplies. I will have categories to offer you a selection: 10, 15, 20 or 25 box tops and redeemable for free scrapbook supplies for you to choose from.

Join me over at Scrapbook For Box Tops and see how you can get FREE scrapbook supplies for your box tops!

My grand daughter and I thank you so much for your help! We look forward to helping you scrapbook, while you help us, help her school! Thank you!
Here is a brief explanation of the

Participating Brands are Pillsbury,Betty Crocker, Old El Paso, Bisquick, Hefty, Ziplock,Cottonelle, Kleenex, Scott, Yoplait, Saran Wrap, Hamburger Helper, Cheerios. And there is a variety of styles of each brand so you have a selection to choose from and still get the box tops.
"Earn cash for your school through everyday activities: buying groceries, shopping online and making purchases with a credit card. All at no additional cost to you! Clip Box Tops from hundreds of participating brands. Earn up to 8% back for your school when you shop online and 1% every time you use your credit card. With your help and the dedication of your school’s volunteer Box Tops Coordinator, your school can earn up to $60,000 through Box Tops each year. That's as much as $20,000 each from clipping Box Tops, shopping at the Box Tops MarketplaceSM and using the Box Tops Visa® card."

Sunday, November 19, 2006

How To Make a Masculine Themed Scrapbook Layout

Sometimes it's hard to do a masculine scrapbook layout. embellishments tend to be a bit girlie or frilly or "themey" - just not a masculine theme. So how do you do a scrapbook layout page for the men? Well, sometimes in scrapbooking, it isn't in the embellishments you use, its in the theme of the layout.

In this scrapbook layout, I didn't use any embellishments! I just matted photos and added a poem. Yes, a poem for a guy! But more importantly, I scrapped my son's dream. Find out what the man in your life's dream is and see how you can scrapbook a layout for him!

When my son was growing up, he dreamed of being a cowboy. Bull riding, rodeos, cowboy hat, horse, belt buckle - the works. Well, he got a few of those things, but life changed and he had to give up on the rest of the dream and I didn't want him to forget his dream. So I scrapped it!

This is a 12x12 scrapbook layout page. I used just a medium blue cardstock for the background page. I used matte metallic gold and silver papers for the matting and the embellishment stripes. The photo below doesn't show the silve/gold papers very well, but they are a soft muted silver/gold. A really nice touch for a masculine layout. I use vellumed to type out the picture titles and the poem. I used a corner round on the photos and the mattes.

Layout is titled, "The Hat, The Buckle, The Cowboy. " There my son is, with his pick-up truck, in his cowboy dress, with his Stetson hat and belt buckle. The buckle honors one of the PBR's most famous bulls... Bodacious...which backs up the memory of Lane Frost.


I typed the poem on vellum and cut the edges with decorative sicssors. I ran it through my Xyron for adhesive. It worked really well as far as not leaving any visable glue marks on the vellum. All the printing was done on the computer.

The poem is by Baxter Black and is called "Cowboy is His Name" which is from his book "Legend of the Rodeo Man". This is again, one of my son's most favorite scrapbook layouts.

Thursday, November 16, 2006

Got Turkey? Here's A FREE Pattern!

This is a pattern for a die cut of a turkey to embellish your scrapbook page. Put your paper in the printer and print it out or print one out, cut it out and trace more from cardstock.

These's turkeys are great for journaling - leave them blank and journal away! Or use them for your layouts title. You could also use chalks, inks or colored pencils to do some embellishing and use it as a paper piece art. Got any feathers laying around? Cut some the length of the die cut turkeys feathers and glue the feathers on the diecut! You could even use patterned paper to make the feathers. Lots of things you can do - just let your imagenation go!

This die cut would also be great for place cards, name cards, gift cards, wall decorations, or whatever your children can think of to use them for! It makes for a great kids craft item.

Turkey Die Cut Pattern

Note: This pattern is not my creation. I don't remember where I got it, it has been in my pattern file for about 8 years! I just wanted to share it with you all!

Wednesday, November 15, 2006

Chalk Some Leaves for Your Fall Layouts! Pattern included!

Get out your chalks and a make-up sponge or cotton ball and start making leaves!

I have included 2 patterns, a small and a large leaf. You can either print them out, then cut them cut and trace the pattern onto what ever color or pattern paper you like. Or you can just put the paper you want to use in the printer. If using a print paper, make sure you have the paper so the pattern will print out on the BACK SIDE of the paper so the outline doesn't so on the patterned side. If using solid, either way, no problem.

Print/trace the leaves then cut them out. You now have a "die cut". Take the die cut of the leaf and crinkle them up in your hands. Cardstock it pretty thick, so you might have to scrunch pretty good. Use your own judgement. You want to get some good wrinkles in the leaf die cut.

Now get out your chalks! You can also use ink for this process, but I never had much luck using ink, so I stuck with chalks. But if you are good with ink, you can try that too. For an applicator, I have found make-up sponges to be the best. Q-tips are the next of my preference or a cotton ball. If you have a way you like to apply chalks, use it!


To get a mix of colors to emphasize the fall colors, start with a light color chalk- like a yellow, then a medium green. Then work a brownish/red in , and then work a dark brown last. You'll use these colors by adding another color on top of them with each layer. Use more of the lighter colors and less of the darker colors - if you use to much dark, you will cover the lighter colors. Remember, you can always add more, but if you get to much, you can't take it away.

Using the sponge and yellow chalk, rub it from side to side over the wrinkles. Then more you rub and the harder you press, the more yellow chalk will get onto the wrinkles and into the creases. How much you rub, determines how much yellow get on the leaf. You are aiming for the color to get on the wrinkles the heaviest and then gradually filter out to the rest of the leaf.

You might have to work a few until you get the technique the way you want it. But it is pretty easy. Lines don't have to be straight and exact and colors don't have to be specific and stream-line so you have alot of "play room". You can make them as dark or as light as you want. You can give alot of color, or just one or two colors.

Once you have the leaves the way you want them, place the chalked die cut face down on a piece of white scrap paper and smooth out the wrinkles a little bit, not much, just to smooth it out a bit and blend the colors a bit more. Now, turn it over and your leaf is ready to embellish your Thanksgiving Day layout! If you have a fall theme, pumpkin patch theme - it works great for that too!


And you can also use these leaves in your interior decorating - make alot of them - (the kids will love doing this!) and use them to decorate the walls, the table center piece - even use them as name place cards! Just get a black marker pen and write names on the leaf and place it on the plate so people can see where they are suppose to sit! Works great!

Large Leaf Pattern

Note: These patterns are not my own creation. I don't remember where I got them, but they have been in my pattern file for about 8 years now! I just thought I'd share them with you all!

Tuesday, November 14, 2006

A Blink In Time - 20 years of Time!

My kids are 4 years apart. They have been close all their lives. It is really strange as I raised them both together, same values, same life style, same every thing - yet my daughter turned out to be a rock and roll girl and my son a country boy. Donny and Marie have nothing on my kids!

But the time has gone by so fast. You just don't realize it until it is gone! (sounds like the makin's of a country song!) And as a mother, it is extremely enjoyable to look back on those wonderful years and remember all those times the kids were together and there for each other. So of course, I have to scrap it!! I made 3 of these layouts - one for me, one for my son and one for my daughter.

This layout is a double page spread. It is 2, 12x12 pages. The title is "A Blink In Time" - half on the top of one page, the other half on the other page. The letters are just sticker letters. I just used black and white checked background paper. Matted the photos in black cardstock and found the most appropriately amazing poem which I printed out in two sections on white cardstock and matted it on black cardstock and put half on one layout, half on the other layout. I dated each photo. There is no journaling on this layout, the photos speak for themselves. This layout is quick and easy, cardstock and letter stickers are the only supplies used and no special tools required, but boy, is it one of my most favorite layouts! The memories are tremendous and I love every single one of them!

This scrapbook layout spans 20 years - from the first time my daughter (the oldest) held her baby brother for the first time, to when he held his little neice (her little girl) for the first time.

The poem is a style that seems they are saying this to each other. Perfectly fitting for the theme of the layout - brother and sister and their friendship and love.


"In a blink, it seems the years go by, but images still linger of times we shared together. We watched out for each other and share secret these days......A friendship, I hope, we'll both keep. Just who will we be, what will we become? Each step is a moment I treasure. When I blink yet again, I'll look back in time and smile at these moments together."

None of us will ever forget these years.

Saturday, November 11, 2006

What's In Your Child's Space? How about a Scrapbook Layout!

I'd like to say I remember my "space" or bedrooms throughout the years. I had quite a few as we moved alot, but quite frankly, all remember is that I had to share with my sister from the day she was born till the day I got married. I remember white, French Provencial furniture and PINK PINK PINK!!!! Other than that, I don't remember any of the things I collected, any decorations, nothing. Oh, except that my sister would hide her alarm clock under the bed as it rang SO LOUD it'd startled me awake in fear! So she hide it under the bed so I couldn't find it and turn it off! Some memory!!

My son had such a collection in his bedroom of several things that really meant a great deal to him. His hopes and dreams, his heros and passions. I wanted to preserve that for him. So what better way to preserve it than in a scrapbook layout! Now married, a police officer and a new daddy - he looks at this scrapbook layout and I can tell he is remembering a wonderful time in his life.

His Dreams: Bull riding and being a cowboy. His heros: John Wayne and the Nutcracker. His hopes: Being a police officer. His passion: A proud American and American History buff.

I took pictures of each "area" of his room - the book case, the posters, pictures on the wall. Some pictures I sillouetted, some I left "as is". I titled the layout "My Room" and the date. I used just some red/white/blue sticker strips and a piece of scrap paper from a american layout in the corner. This layout shows that you can include year's of memories in just one layout and still have the full impact.

One wall was full of pictures of his hero - John Wayne. I collected them from a variety of places and the one he got in Tombstone, AZ held a very special memory on its own. Also is a full size cardboard image of John Wayne! Also on this wall is his bull riding gear. He never got to do that dream but it is a fond memory for him. But he did get a life-size, stand-up poster of Ty Murry - World Champion Bull Rider, several years in a row!


Next was his computer - he was a wiz! And the bull riding and the Alamo posters above it were his heart's dream. The Alamo posters were ones we got when we went to that sacred place in history and even visited John Wayne's reproduction of the Alamo for his 1960 movie.

The top of one dresser is full of 57 Nutcrackers - all different. When he was 5 he heard that story on cassette tape and Nutcracker became his hero and he loved collecting them. Each one is different. On the bookcase are his VHS tapes of all the Duke's movies he collected, his books and movies about WWII as he was a history buff about the subject, topped off by the American Flag.

What's in your child's "space"? What memories does your child's room have for them? These memories are ones that you don't want your child to forget, but might not be something you can make a specific layout of. Put all the memories together and what have you got? Memories galore - on one scrapbook page layout!

Also notice how quick and easy this layout is. I only used a few "left over" sticker strips and a piece of a flag pattern paper and some sticker letters. I sillouetted some of the photos, others left uncropped.

Wednesday, November 08, 2006

Scrapbook Page from a Comic Strip Point of View

Scrapbook layouts can be tailored, whimsical, elegant, bulky, ornate and the list goes on. But sometimes plain and simple preserves the memory every bit as good! And oh, for the simple things in life to make the memories!

When I took these photos it was because it was so cute.. my son and his new neice. Here is this big, tough man with a 9 month old little girl giving him havok - and she is winning!

Once developed, and I was deciding how to scrap the photos, I noticed that there was a progression of movement in these photos. My first thought was comic book! What a great idea! So I put them in sequence and then started thinking of captions for each photo.

It started with my son looking through the local paper to buy a truck. Little neice climbed in his lap and started "looking at the paper with him". So that is where I started. The sequence of the photos starts with them "looking" at the paper, then her taking it from him, then getting done and thowing the paper away!!

The captions read:
"Let's look through this paper, Kellie"
"Give it to me Uncle Michael, I'll find you a truck!"
"Nothing in here but junk, Uncle Michael"
"Here - throw this away!"


I doubled-matted each photo with solid yellow and solid blue. I then placed the matted photos in a square design. Using yellow/blue pattern paper, I cut strips to "frame" each photo and caption. And we are done! A quick and easy scrapbook layout and all it took was some scraps and glue! Doesn't get much easier than that! And we laugh at this one every time as, now 6 yrs old, the little girl still gets the best of the rough, tough man!

Saturday, November 04, 2006

Library Pocket Pattern and Directions

Here is the Library Pocket pattern I use often. When my local library decides to discard older books, they first offer them for sale. I bought some one day and noticed this pocket for the check-out cards that they use to use in the "old days" before computers and all! I remember how cool it was to watch the librarian pull the card and stamp the return date and slide the card back into the pocket!!! My sister and I always like to "play" library and we'd collect all our books and shelf them "properly" and make them each a card. Didn't have a stamp thing, but used whatever we could figure to just get that stamp motion going!

Anyway, I peeled the pocket off the book I bought, and opened it up and used it for a pattern. I like this in my layouts as it offers me a way to have many photos on one layout without having to crop and matte and be limited on how many photos I can use.

I do 8x10 pages with one photo displayed, a few embellishments and title and then a pocket with all relating photos and a cardstock card for the journaling. These are quick, easy and a great way to get caught up or keep scrapping if you are very limited on time.

Step #1. Fold DOWN the the small flap on the top - this is the front edge of the pocket
Step #2. Fold UP the back flap (the longest flap)
Step #3. Fold IN the 2 side flaps so that they cover the back flap
Step #4. Add glue to the inside of the side flaps and secure them to the back flap.

And there you have it! Decorate as you like! You can use 8x10 pattern paper or solid cardstock. Just watch how your printer prints out to know if you put your pattern paper pattern side up or down in your printer. This will print out with the lines, so you dont' want the lines on the pattern side. Solid, doesn't matter - just turn the paper over.

Library Pocket

A good tool to have for this is a bone folder or plastic ruler to make creases instead of your fingers! It makes a much neater and specific fold. Also, a ruler and an embossing stylist are great for making sure your fold lines are straight and the top and bottom lines up properly.

Wednesday, November 01, 2006

ABC Christmas Scrapbook Memory Album

A fantastic way to help your kids learn their ABC's is to make an ABC scrapbook album. I recently wrote about the one that I made using pictures of items that mean something or have special meaning to the child.

But another fun way to incorporate the ABC's into a scrapbook album is with a fun holiday. Something they can learn with this year, but bring out in years to come for fun and memories!

So with the Christmas holidays approaching, start now and have your child's Christmas ABC album ready by the first of December so they have lots of time to enjoy it!

Here are some suggestions to get you started in your search for images, pictures and "things" to use in your album. Remember, look at your own photos of your family's past and try to use those in the album - For instance the B for "building a snowman" - do you have a photo of family members building a snowman in previous years? That'd be the perfect item for B!

You can use a specific item or a phrase to display the letter. When using a phrase, just make the letter a capital and the rest lower case ( sUgar rUsh for the letter U) or the letter in RED and the rest green to set the letter out.

A: Advent calendars, advent candles, angesl, anticipation, apple pie,
B: Baking, baby's first Christmas, building a snowman, bundled up to go, "better be good!", bye-bye
C: cutting the tree, chimney with care, Christmas cookies, candlelight, cards, hot coco, christmas cheer
D: decorating the tree or mantle, Daddy, dinner, new dresses for the holidays, dreams, decorations
E: enjoying, Christmas Eve, eggnog, elves, eating together, everyone around the table, everyone is here!
F: fun with family, family, friends, fresh snowfall, fireplace, building a fire in the fireplace, fresh holly
G: guests, gingerbread cookies or houses, Grandpa, Grandma, grand kids, great fun, family gathering, gifts
H: Home for the holidays,hanging the decorations, helping mom/grandma, holly berrys, hope, happy, hugs
I: ice skating, ice fishing, icicles on the tree, indoor fun, no room at the Inn, in line for Santa
J: jolly old St. Nick, Joseph & Mary, Joy, Jesus birthday, just the best day, just having fun, joking around
K: kitchen capers, kisses, kids, the three Kings, keeping the Christmas spirit, kettle of cookies
L: lights on the tree/house, light in the neighborhood, laughter, lots of snow/fun/food, laying down to sleep
M: making memories, making crafts, christmas morning, Mommy, mistletoe, midnight mass, Mr. Claus,
N: nativity scene, nutcracker, nieces, nephews, naughty or nice, nuts, new toys, Night Before Christmas
O: ornaments, opening gifts, outdoor fun/decorations, "oh's and ah's", "Oh my goodness!", off to sleep
P: presents, christmas program, popcorn to string, parents, pair of turtledoves, partridge in a pear tree
Q: quilts to snuggle, questions ("Can I open it yet?") quizzical looks, quite a show!, quiet and sleepy
R: relaxing, resting, relatives, reading the Christmas story, rambuncious kids, ready to go to Grandmas
S: snowball fights, snowfall, sliding, skiing, skating, stockings were hung, special surprise, secret Santa
T: tree trimming, time for_____, taking it easy, a trip to _____, traditions, "take a cookie time out!", trust
U: under the tree, unforgettable, unbelievable, under the eaves, unsuspecting eyes, sugar cookies, sugar rush V: visits, holiday visitors, vacation time, very ______(delicious, etc), very special,
W: wraping the gifts, waiting for Santa, watching for reindeer, winter wonderland, wishing for ___,
X: x-tra special, x-traordinary, x-tra gifts, x-tra food, x-tra cookies, x-tra kisses and hugs
Y: yearly chirstmas letter, yule log, year end memories, best time of the year
Z: zipping up to keep warm, catching some z-z-z-z-z's, zest, zealous, zip the lips to keep the secret!

The list is endless, of course! Once you get started, you are sure to find your own ideas and things to use. Just try to look for unusual things, that are not so common. This will help the kids not only to learn the alphabet, and new words, but learn that there are are other things about christmas besides just gifts, toys and cookies!

Happy early holidays to all!

If you have a word or phrase you'd like to add to the list, just click below on "COMMENT" below and share it with us! Some of these word suggestions are my own, some are from a collection I did few years ago when I made this kind of album.