
Thanks for collecting and helping my grand daughter with her school project! Join the Mailing list over there and you'll be among the first to hear of new supplies posted!

Things I included:
Who was President/Vice President that year
Top 10 Songs of that year
What happened that month in past years (June 1752 Ben Franklin's kite is struck by lightening!)
What happened during that month and year. (June 4, 1982 - The Wrath of Khan premiers)
The price of different things: loaf of bread, gallon of gas, milk, house price, price of a car
Hot/popular toys of that year
Top movies and TV shows of that year.
To get things that happened in a specific year, try Scopes Systems. Here you can input your month and year, and it will give you all kinds of great things that happened that month and year. Pick and choose which ones meant/mean something to you or changed your life (or the world) or had special meaning to you.
Another way to "remember the years" with no photos, is to document things that happened in Hollywood! Remember your favorite movie that year? Favorite actor? You can get some things from American Film Institute about TV, celebrities and movies in past years. They partiularly have a category called "Top 100 Years..." for movies and TV shows that were rated 1-100 in the last Century in different categories, like:
AFI's Top 100 MOVIE QUOTES (a no brainer on #1)
AFI's Top 100 PASSIONS (romance movies)
AFI's Top 100 SONGS
AFI's 100 THRILLS
You're going to have a blast from the past as you go here to find your scrapping information. Better bookmark it - you're going to want to go back!
This is a layout using the Top 100 Thriller Movies of the Century. I just typed them out on 2, 8x10 pieces of cardstock and printed the list out on the computer. (I am only showing one side, but this is a 12x12, double page spread) Then used a film strip die cut and a die cut of a movie camera. Quick, easy and oh, the memories!! And not a picture was needed.
Another layout I did was one I called Top (50) TV Shows of All Time. How Seinfeld made #1 over I Love Lucy, is a total fluke in my book, but what happens, happens! On this layout I copied from
TV Guide the covers of the ones that had my favorite shows and inserted this small "photo" into the film strip die cut. See- there's I Love Lucy right at the top like she should be!
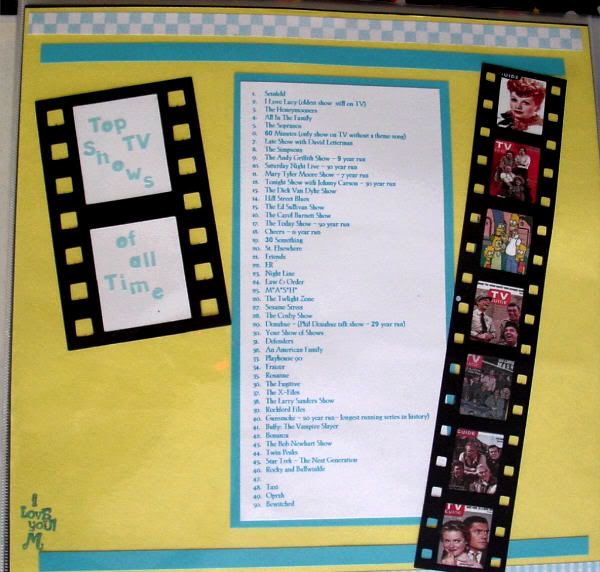
I just added a few paper strips (from scrap paper) and the layout is done in minutes...quick, easy, and inexpensively!
So scrapbook the history in your life time. There are lots of memories there that you will want to remember in years to come.
And even if you dont' use these as titles, how many do you remember? How many did you USE!!! Have a good laugh, a fun memory and watch to find out which is #1!
I am collecting the pink "box tops for education" squares on participating brands. Participating Brands are Pillsbury, Betty Crocker, Old El Paso, Bisquick, Hefty, Ziplock,Cottonelle, Kleenex, Scott, Yoplait, Saran Wrap, Hamburger Helper and Cheerios. And there is a variety of styles of each brand so you have a selection to choose from and still get the box tops. Here is what a "box top" looks like: I believe in a good education and I want that for my grand daughter. So I am doing this on a volunteer basis to help my grand daughter collect the boxtops for her school.
Just snip off the pink BOX TOPS FOR EDUCATION square from the top, side, back or bottom of the product and save them until you collect enough for your choice of free scrapbooking supplies. I will have categories to offer you a selection: 10, 15, 20 or 25 box tops and redeemable for free scrapbook supplies for you to choose from.
Join me over at Scrapbook For Box Tops and see how you can get FREE scrapbook supplies for your box tops!

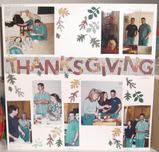
This is a pattern for a die cut of a turkey to embellish your scrapbook page. Put your paper in the printer and print it out or print one out, cut it out and trace more from cardstock.
These's turkeys are great for journaling - leave them blank and journal away! Or use them for your layouts title. You could also use chalks, inks or colored pencils to do some embellishing and use it as a paper piece art. Got any feathers laying around? Cut some the length of the die cut turkeys feathers and glue the feathers on the diecut! You could even use patterned paper to make the feathers. Lots of things you can do - just let your imagenation go!
This die cut would also be great for place cards, name cards, gift cards, wall decorations, or whatever your children can think of to use them for! It makes for a great kids craft item.
Note: This pattern is not my creation. I don't remember where I got it, it has been in my pattern file for about 8 years! I just wanted to share it with you all!
Now get out your chalks! You can also use ink for this process, but I never had much luck using ink, so I stuck with chalks. But if you are good with ink, you can try that too. For an applicator, I have found make-up sponges to be the best. Q-tips are the next of my preference or a cotton ball. If you have a way you like to apply chalks, use it!
You might have to work a few until you get the technique the way you want it. But it is pretty easy. Lines don't have to be straight and exact and colors don't have to be specific and stream-line so you have alot of "play room". You can make them as dark or as light as you want. You can give alot of color, or just one or two colors.
Once you have the leaves the way you want them, place the chalked die cut face down on a piece of white scrap paper and smooth out the wrinkles a little bit, not much, just to smooth it out a bit and blend the colors a bit more. Now, turn it over and your leaf is ready to embellish your Thanksgiving Day layout! If you have a fall theme, pumpkin patch theme - it works great for that too!
Note: These patterns are not my own creation. I don't remember where I got them, but they have been in my pattern file for about 8 years now! I just thought I'd share them with you all!
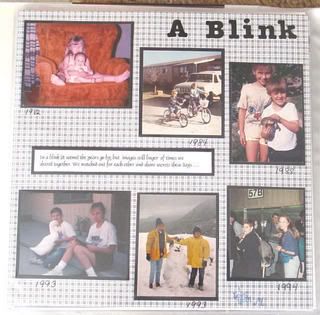


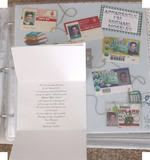
This layout is of my son's 6 years of high school - which includes 2 years of Junior High. He was going to throw the ID's away when he moved out, but he knew he'd better check with mom first, so he asked me if I wanted them. Need I tell you whether I said yes or no?!
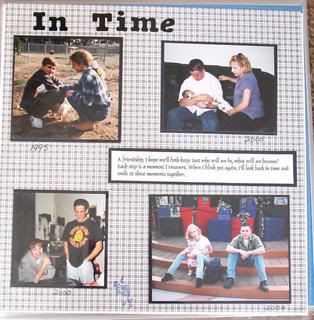
I wanted to use the cards in chronological order with his graduation announcement the final "step" through his high school years.
Scrapbook Techniques Used
I layed the ID cards out on the page in the year formation I liked. I used jute twine as my form of "continuation" or the path to follow "through the years". I then used a hole punch and punched a hole in a corner of each card in different corners, so that I could loop and twist the jute through each hole and wind it around and down the page, connecting each card and ending at the announcement. I used adhesive photo squares to secure the cards to the background page. The jute is not secured, excepet on the back of each card near the hole to keep the jute in place.
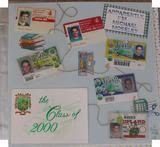
The announcement is a tri-fold style. I glued the back (middle section) to the layout background page. Then I slide the layout into the page protector. Using a craft knife, I carefully make a slit at the top fold and one at the bottom fold of the announcement so that the top and bottom of the announcement could slide through, thereby being able to be opened once in the album.
A few "back to school" theme stickers completed the layout.
When I gave the layout to my son, he was amazed and stared at it for the longest time and every time he gets the album out he spends time looking at this layout. I can only imagen the memories going through his head about those years of his life!
Scrapbook Tools Used
Cardstock, hole punch, adhesive photo squares, jute twine, stickers, Student ID cards, Graduation announcement,

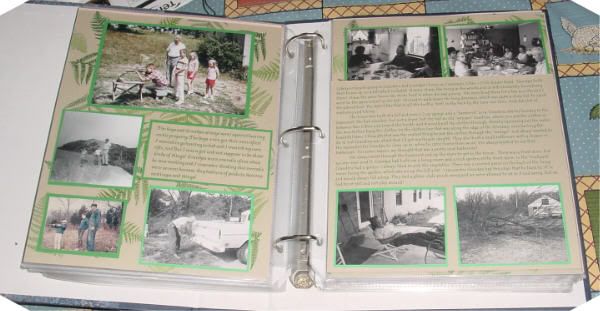
Journaling is an absolute MUST for scrapbooking. It can be a little or alot, but you really need to have it. Journaling often often holds the memory more than the photo does. Sometimes, there are no photos for the memory so journaling makes the memory.
Journaling is all about memories. You will always have memories, but as time marches on, many of them fade.Sad, but true, you think you will always remember them all, but as life moves on, so do the memories, to make way for the new things to remember. Many times you can remember the event but it often stops there. You don't remember the specifics or the feelings or the moment.
Scrapbooks are memory holders - journaling is memory makers.
What is Journaling?
Journaling is the title, the story, the caption or description, the theme, the senario, the point of the layout - what you want to remember! It can be done by hand or computer. Some say by hand is best as your handwritting is another memory you are creating. Others say because their handwritting is not very neat, they prefer the computer with all its fonts. And then of course, if you have alot to say in the memory, the computer is often the better way to go, simply because of the needed space to get the memory down. It is your decision for your scrapbook layout. Don't stress about "how" to do it, just make sure you do it and your imagination will take it from there.
What Should You Include in the Journaling?
Family histories are so much more than pictures of birthdays or every day, usual events. Strive to capture what makes an event a special memory you want to keep and what makes your family members unique because of this memory. Everyone has birthdays, so don't just say "Happy Birthday!" Journal about why this one is so special. Why was it different from last years? What happened this year, that didn't happen last year? Why are you scrapbooking this event? Are there hopes and dreams for the next year? Who was there? And especially the person's name - this way, future generations will always know who the person is. I say that and many of you will probably say ,"Well, yeah of course the person's name", but sometimes when you are working by yourself, you get wrapped up in the production of the layout and you own personal memory of the event or person, that you tend to write based on your own time right here and now, not thinking that future generations will be looking at this scrapbook layout and might need to know a little more about the subject.
Solution: Be detailed and specific. Don't assume others will know the memory so they won't need the details surrounding it.
Journal Using Your Own Handwritting
If you want to use your own handwritting to journal in your scrapbooks, and have a problem with writting "straight" on the page, journal "around" something! That way it won't matter if you are straight or not! Use a ruler and pencil to draw faint lines where you want to journal. When your writting ink has dried, you can erase the lines. Make your journaling in "pieces". Write a few lines here and a few lines over there and a few more own there. If you keep the length of the lines you are writting short, they won't tend to get crooked. Use acid-free, archival gel pens or markers. They come in all colors and tip styles (straight, thin, thick, caligraphy,etc). On dark backgrounds, those metallic silver, white and gold pens are absolutely wonderful for the journaling!
Journal Using the Computer
With all the fonts out there today, you can pick and choose till the cows come home! You can find whimsical, funny, structured, bold, themed, script, standard, weird and the list goes on! Pick one that matches the feel or theme of your layout. If you are journaling about a wedding, a script style would be nice. If it is a child's layout, choose a silly looking one or one that resembles a child's handwritting. The possibilities are endless! You can also change the font color. Bold, underline,italic, size - so many ways to add to the flavor of the journaling to match your theme. Print it out on cardstock, and cut it to your desired size or shape. You can print on solid cardstock or pattern paper. Printing journaling on vellum is a really wonderful way to add your journaling, but also add a special embellishment to your scrapbook layouts.
Where Do You Journal on a Scrapbook Layout?
Since the journaling is about as important as the photo - journal anywhere you want!
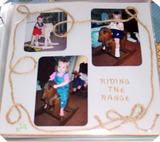
Journal on a die cut that is the theme of your layout. If you are doing a layout for a pet, use a die cut relating to the pet and journal on the die cut! For a dog, get a bone die cut. For a cat, use a mouse die cut. If you are doing a boy layout, get a wagon or a truck die cut and journal on it. For a birthday - a birthday cake die cut or for a picnic, use a picnic table die cut and journal on the "table top". The limit is only in your imagination! Back to school - grab an apple die cut or a school bus!
Trace a child's hand or foot print on the background paper and journal inside the imprint!
Use a tag die cut and journal on one side, and place a photo on the other! With a fiber tassel, its a great embellishment!
Use stencils - Use a pencil and lightly trace the shape onto the background paper. Then just write inside the stenciled shape! When the ink dries, erase the outline. This is a great way to get journaling in a circle which can very much add to the design of the layout!
Use Line stencils: These are stencils and they are just "lines" to actually write in, like squiggly lines, or spiral lines. There are stencils that is in the shape of something - like a balloon, or an animal or a tree. These serve 2 purposes. You can use them to journal in and trace them, cut them out and you have a die cut!
Make a book embellishment and journal inside the "book" StoryBook Time
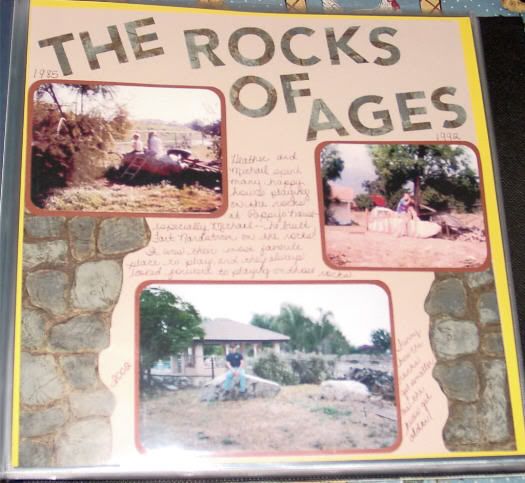
Date Your Journaling
Another important thing to include in jouranling is the time and date of the layout. If you are reading a journal item and the date is there, it will be more memorable. "In June 2003, we went to our most favorite camping place". You have set the date, the event and the memory all of which will be important in years/generations to come.
When Do You Do the Journaling?
That is kind of up to you. You find when you can do it best so that you include all the details you want to be remembered. I usually do my journaling (on the computer) first, as I almost always do it on cardstock and make a matted block of my journaling and have that ready to include when I am setting my layout. Or you could do the layout and then just journal around the items on the layout. It doesn't have to be a "set in stone" action and no matter what you decide to do, you will most likely change it many times in your scrapping ventures so don't make a big deal of the "when", just make sure you do it and don't forget anything! You can always work around things.
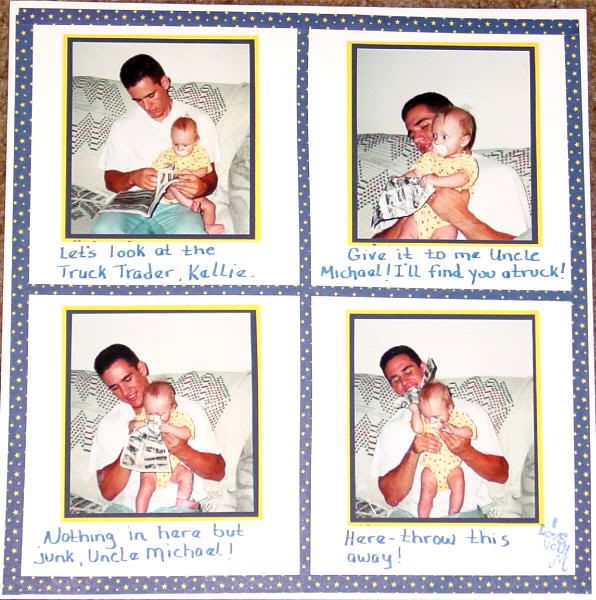
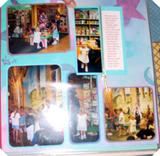
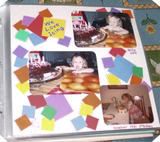 "We Love Icing" - The top 2 photos are of my grand daughter "sneaking" a taste of the icing on a birthday cake. The lower photo is my daughter (her mother) "sneaking" a taste of the icing on a birthday cake 20 years earlier! Mother is a bit older than daughter in these photos, but the "sneaking" was obviously inherited!
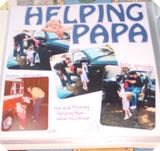 "Helping Papa": The top 3 photos in this layout are of my grand daughter helping her Papa wash his truck. The lower photo is her mother - 20 years ago at the same age, helping her Daddy wash his truck. Although some things never change, (you know men and their trucks!), these 2 little girls are definately related! Notice the little sillouette of my grand daughter looking over the one photo at the top!
 'Little Girls Don't Shave"
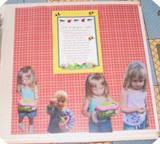 This is the layout with the book closed and the journaling showing
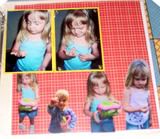 Open the book and there are more photos!
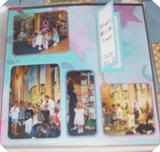
This is also great to have these mattes available for taking to crops or scrapbooking parties!
Your only decision is what color to make the mattes - which is so easy! Use the color you like, the color that matches the photo, the color that brings out something in the photo, a color that brings out the theme you are working on ....
Give it a try and see how fast your scrapbook layouts get moving! These are also great for doing scrapbooks for a single situation or person. For instance, if you are doing a grandparent scrapbook - one matted photo on one page and journaling on the opposite page. Or an "About Me" scrapbook - again, one photo on one page and journaling on the opposite page. This way your color theme is continued throughout the scrapbook.
(These are directions from a craft show I saw awhile ago. I don't remember which one, but I wrote down the instructions while I was watching it and have used them many times! Hope they help you, too!)
Calling all scrapbooking fans! Join me on myLot! Discuss scrapbooking topics and make a little money while you're at it. |


